This guide is intended for non-Android team members who want to setup Android Studio for Demo/Design/Debugging purposes. This is not intended for developing on the mobile-android project. For those who wish to see the Android codebase, checkout the Android on-boarding wiki.
In this Wiki, we will go through the steps of:
- Setting up Android Studio on our Banno MacBook’s to run the Banno Mobile Android app
- Setting up Android Studio’s emulators
- Building a local apk for a specific release or current master
- Running that apk on an emulator
- Lastly we’ll go over some tools Android Studio has that can be helpful for debugging and design {:.lead}
Download Android Studio
Let’s start with downloading Android Studio. The current version of Studio, as of writing this wiki, is 3.0.1 and it’s the version the cool guys on the Android team are currently using. The screenshots and setup are geared toward this version, but it is highly recommended that you download the latest stable version.
Stable version of Android Studio are listed on the archive page with the button “Show stable only” selected, also there should be a link to the “latest stable version” at the top of the page. Let’s check the archives for the .dmg of the latest stable version, and use the Mac installer. Agree to the terms of service, and download.

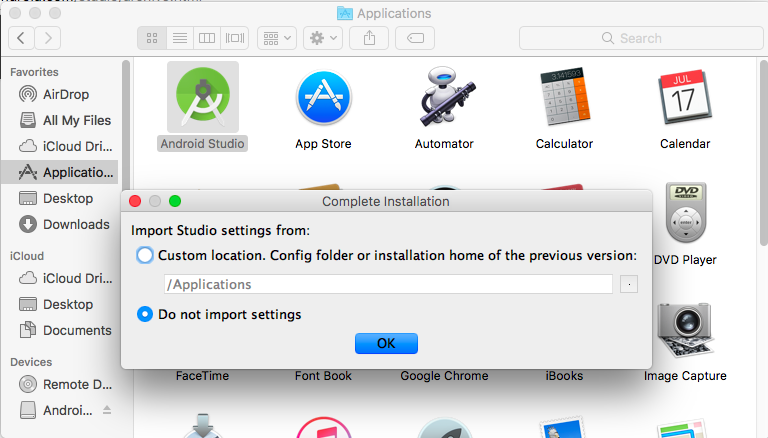
Now let’s open up the downloaded android-studio-ime.dmg. Drag studio into your application folder. Once the installation is complete Android Studio will ask if you want to import settings from a previous version, select “Do Not Import Settings”.
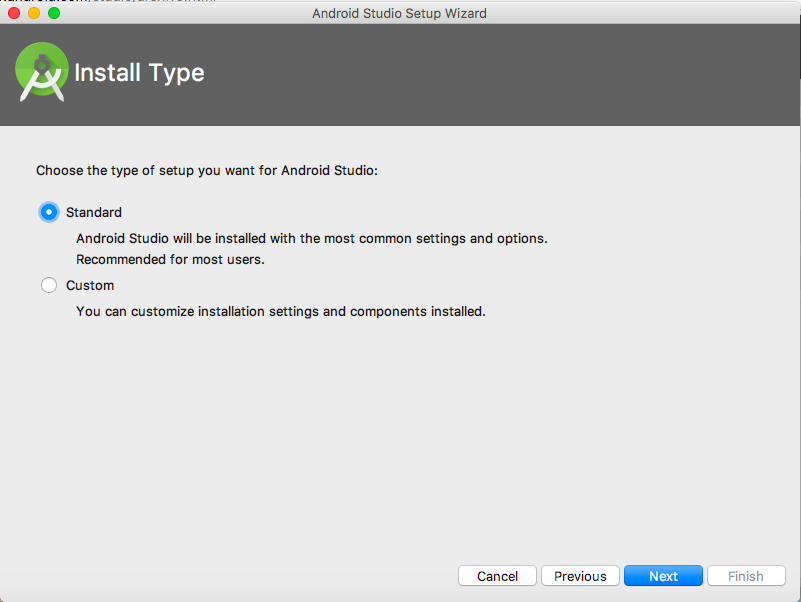
Click next and Android Studio will install some of the standard SDK library dependencies. Android Studio’s setup wizard should be on screen. For Installation Type: let’s pick standard, that’ll give you all the basics.
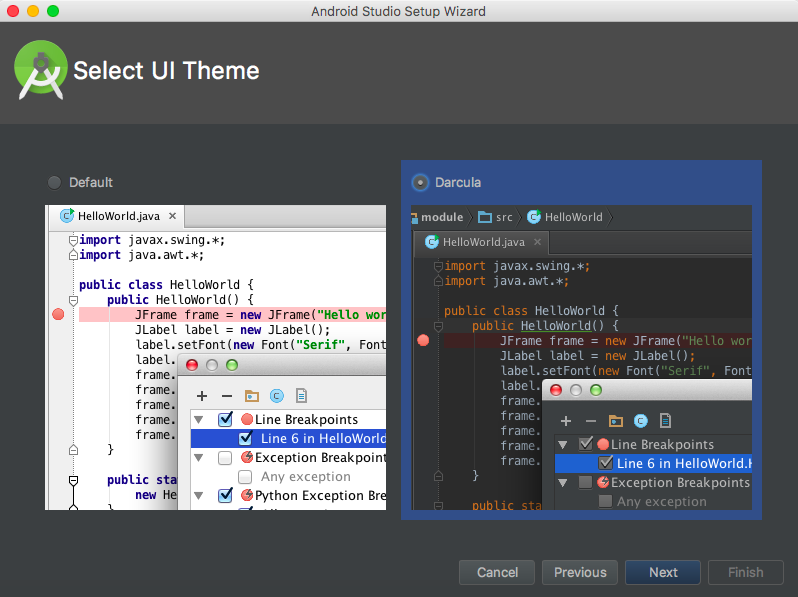
Next it will prompt you to pick a UI color, most Android team members use Darcula, because we’re edgy yet sensitive.
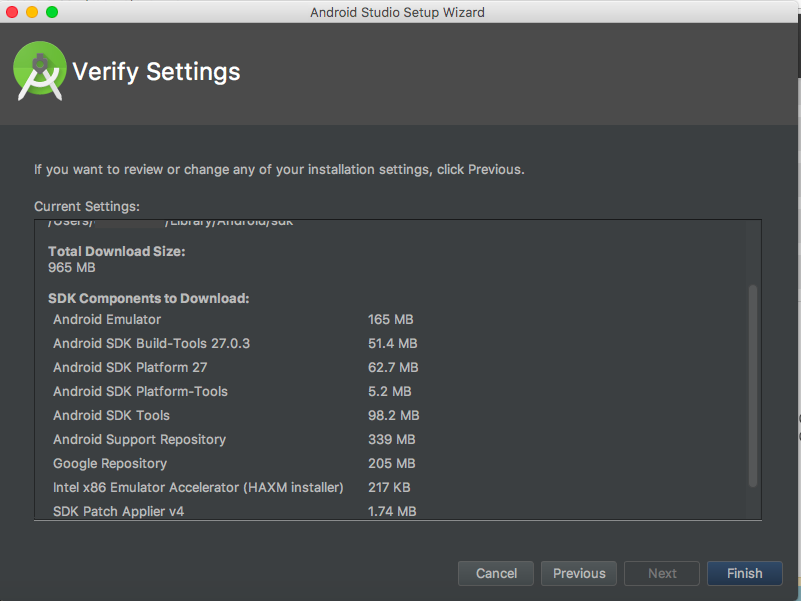
Hit next and setup wizard will ask you to verify the settings you’ve chosen. Click finish, Android Studio will proceed to download what appears to be everything under the sun.
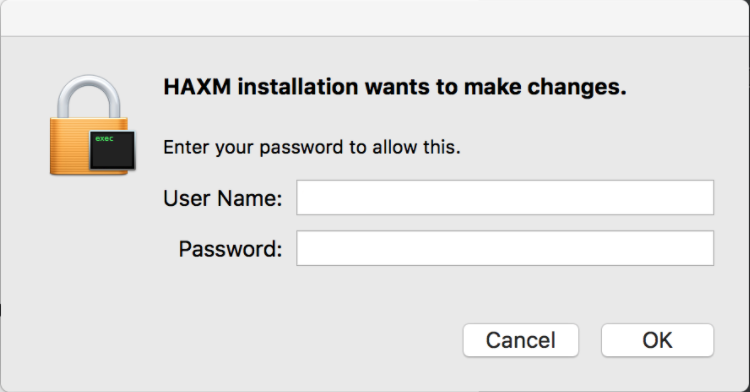
During the installation process Android Studio will request permission to install HAXM, or Hardware Accelerated Execution Manager, this is a manager that allows images of emulators to run on your device and is perfectly safe. It just happens to be an unfortunately malicious sounding acronym. Provide your admin login and password to give permission.
Once finished Studio will be ready to go. You should see a prompt asking if you want to create new project, import an existing project, etc. In order to open Android Studio and run emulators you need to designate a project.
So for our purposes we will be creating an empty project, this tends to be the easiest way to jump in without needing to clone the mobile-android project or having to run “Debug or profile the apk”, as debugging the apk is a bit messy.
If you would like clone the mobile-android project, you are more then welcome to, just follow the Onboarding Guide on the Android wiki.
So let’s setup an empty Android Studio project.
Setup an Android Project
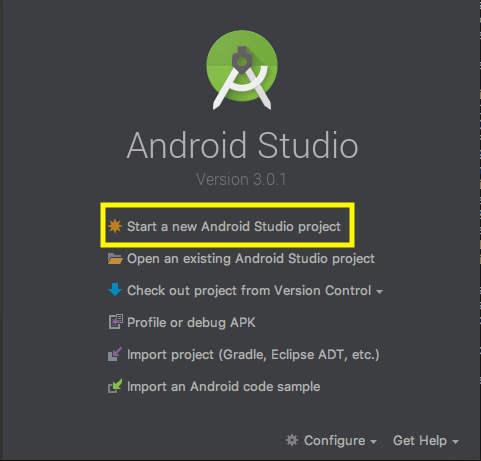
So now that we have Android Studio installed, we need to get a project up and running. We will be creating an empty project solely for the purpose of running Android Studio’s emulators. Let’s click “Start a new Android Studio project”
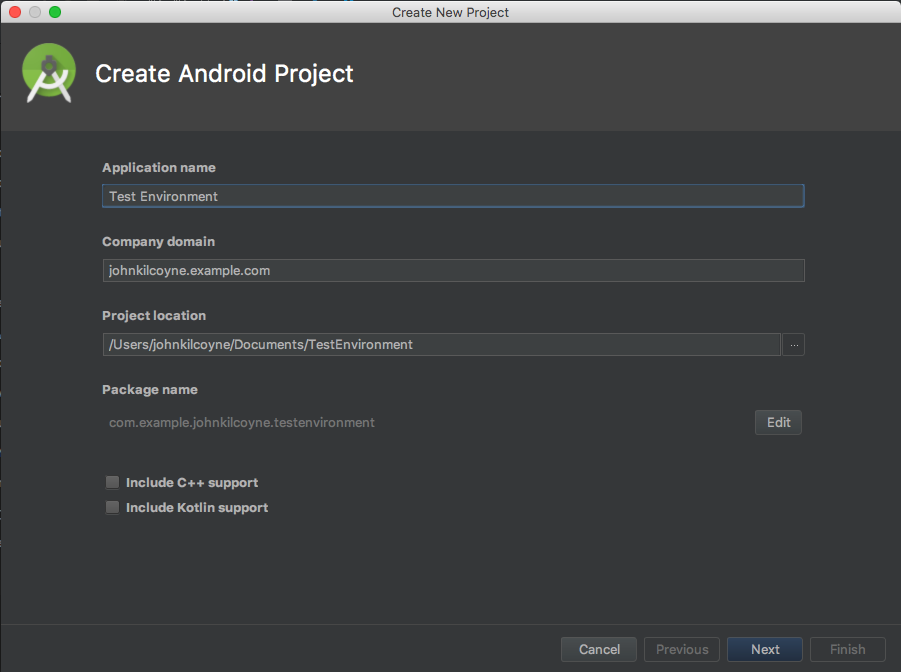
Next we will create a project name, we can just leave everything as is. I really dislike the whole “My” naming convention, so I’m going to name my project “Test Environment” and leave everything else as is. Click next when finished.
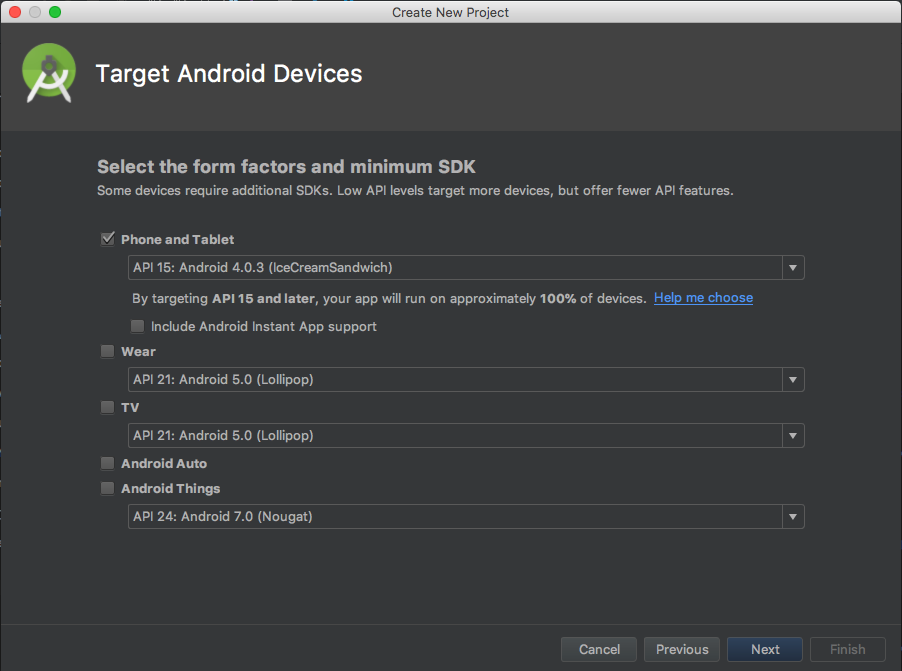
Next studio wants to know some information on what we’re targeting with this new project, by default it chooses phone/tablet target API 15, which is fine. Leave everything as is and hit next.
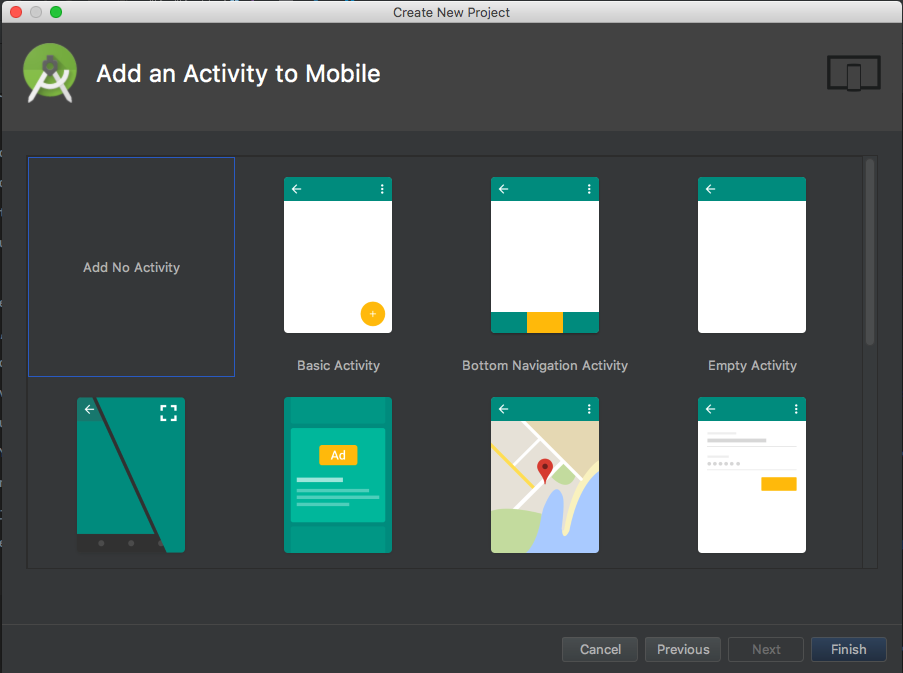
Now we should be looking at a screen asking you to add an “Activity” to Mobile. For our purposes we don’t care about the Activity, choose “Add No Activity” and hit finish.
So now we have an empty project loaded up, let Android Studio finish building. You’ll most likely see a couple error’s.
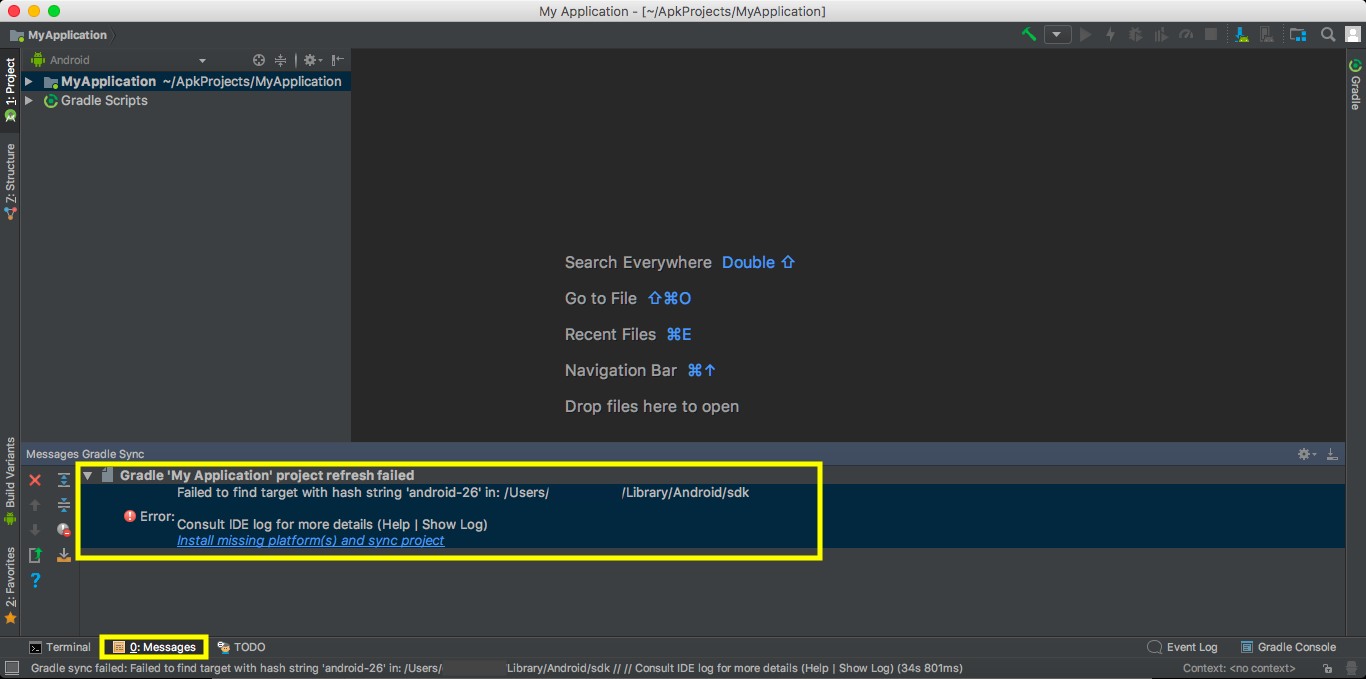
First, Gradle will probably be mad that you haven’t installed the target sdk. Let’s do that, click the link “install missing platform platform(s) and sync project”, accept any licenses, download and hit finish.
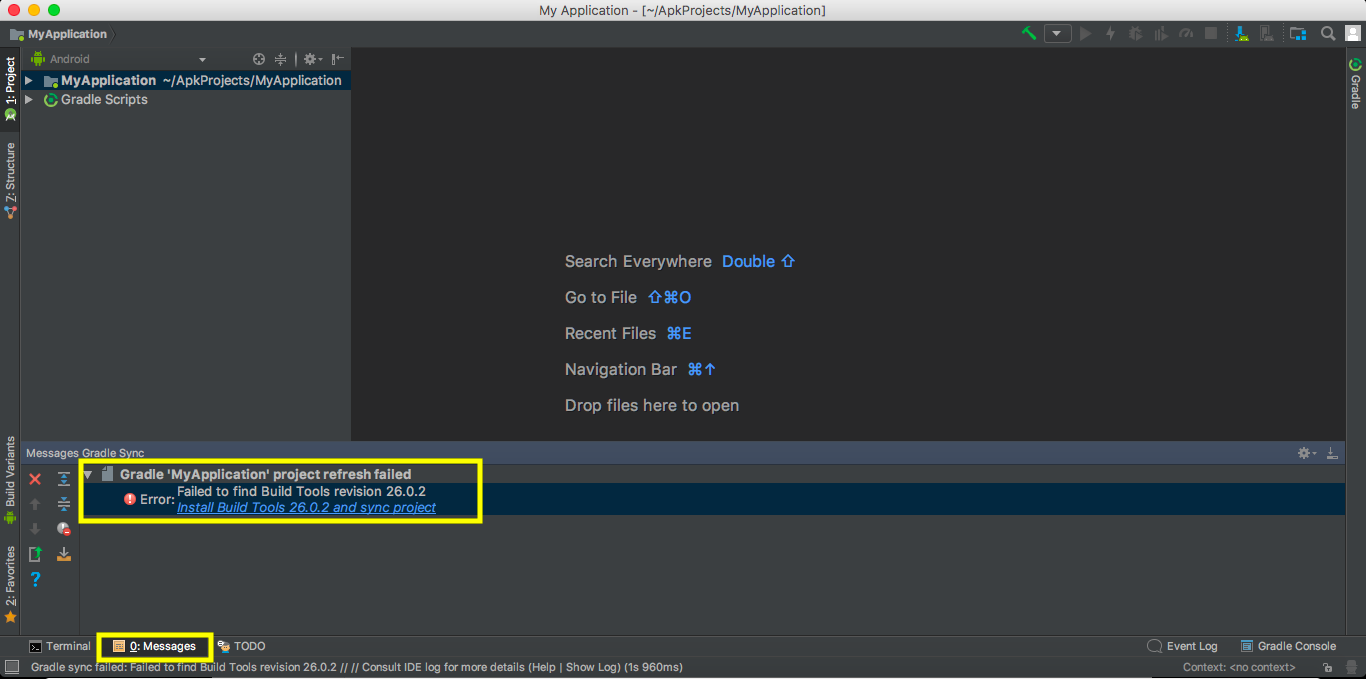
After the target sdk is installed you’ll probably see another error about Android Studio being unable to find Build Tools. Here we will just click the link below the error, “Install Build Tools xxx and sync project”, accept any licenses, download and hit finish.
You’ll find that any dependencies Studio needs, Studio will supply you with a means to download it. So if you run into any other errors, Android Studio typically shows a path to resolve them similar to the steps above, follow the instructions prompted by Android Studio. If you get stuck you can always ping in the team-android room, one of us can help you out.
Now that we have Android Studio set up, Let’s take some time and talk about our apk build job, move on to the Building an apk section.
If you already have an apk build then you can move onto the emulator setup section.
If you’d rather run the apk from a physical Android device, and check out the apk on physical device section.
Building an apk
You can build a version of the Android app at anytime. Whether it’s the latest release, or our current in development master. In slack go to the team-android room, in the description of the room there is a link to a Jenkins job that will allow you to “Build app for institution”, this will link you to the Jenkins job page for building apk’s based on institutions and environments.
You need to make sure you’re on the VPN in order to gain access to Jenkins. Make sure you log into Jenkins otherwise you won’t be able to build, login is integrated with Github.

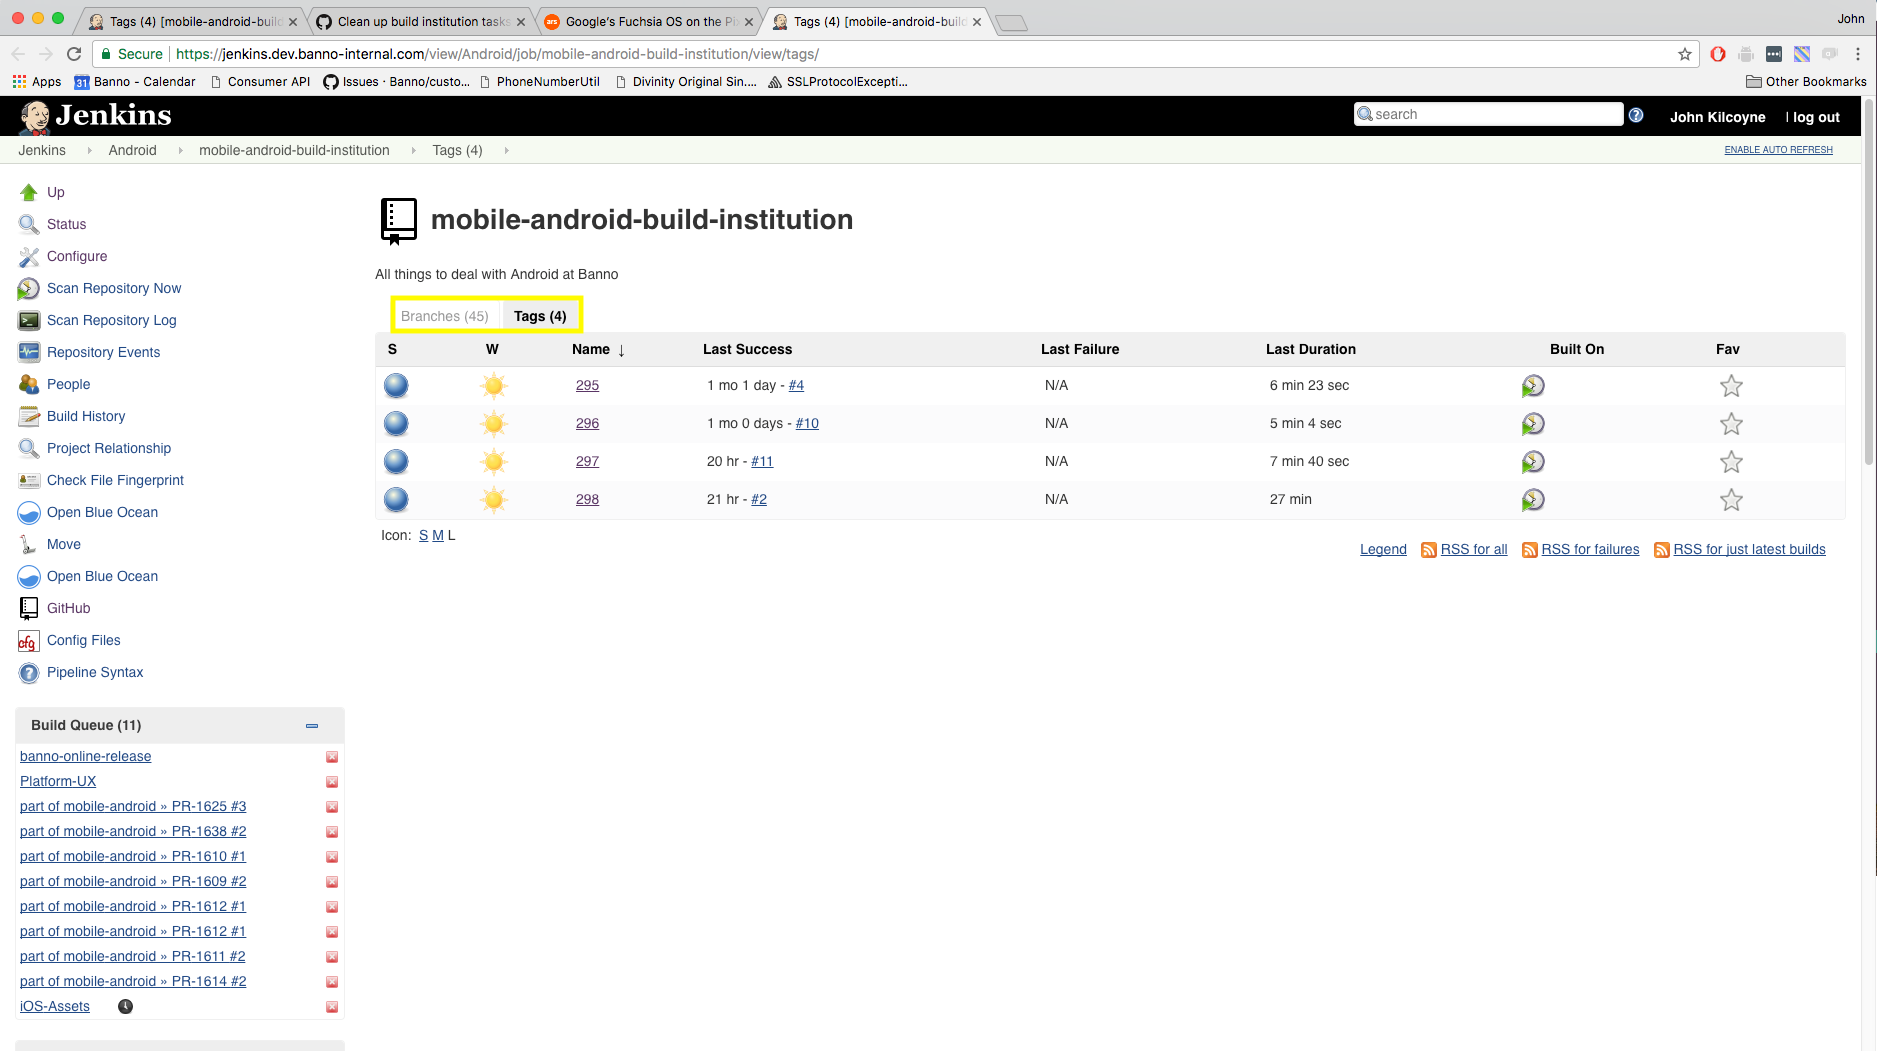
Now you should have landed on a page with two tabs. The first tab is “branches”, these are the current Android dev branches. The second tab “Tags” contains the previous Android releases. Each tag corresponds with a specific release, looking at the version “2.3.xxx”, the “xxx” would be the tag. The latest release will be the highest numbered tag in the list.
Let’s build the current release version, click on the latest release tag. To the left you should see the option ‘Build with Parameters’, be aware that option will not show up if you’re not signed in.
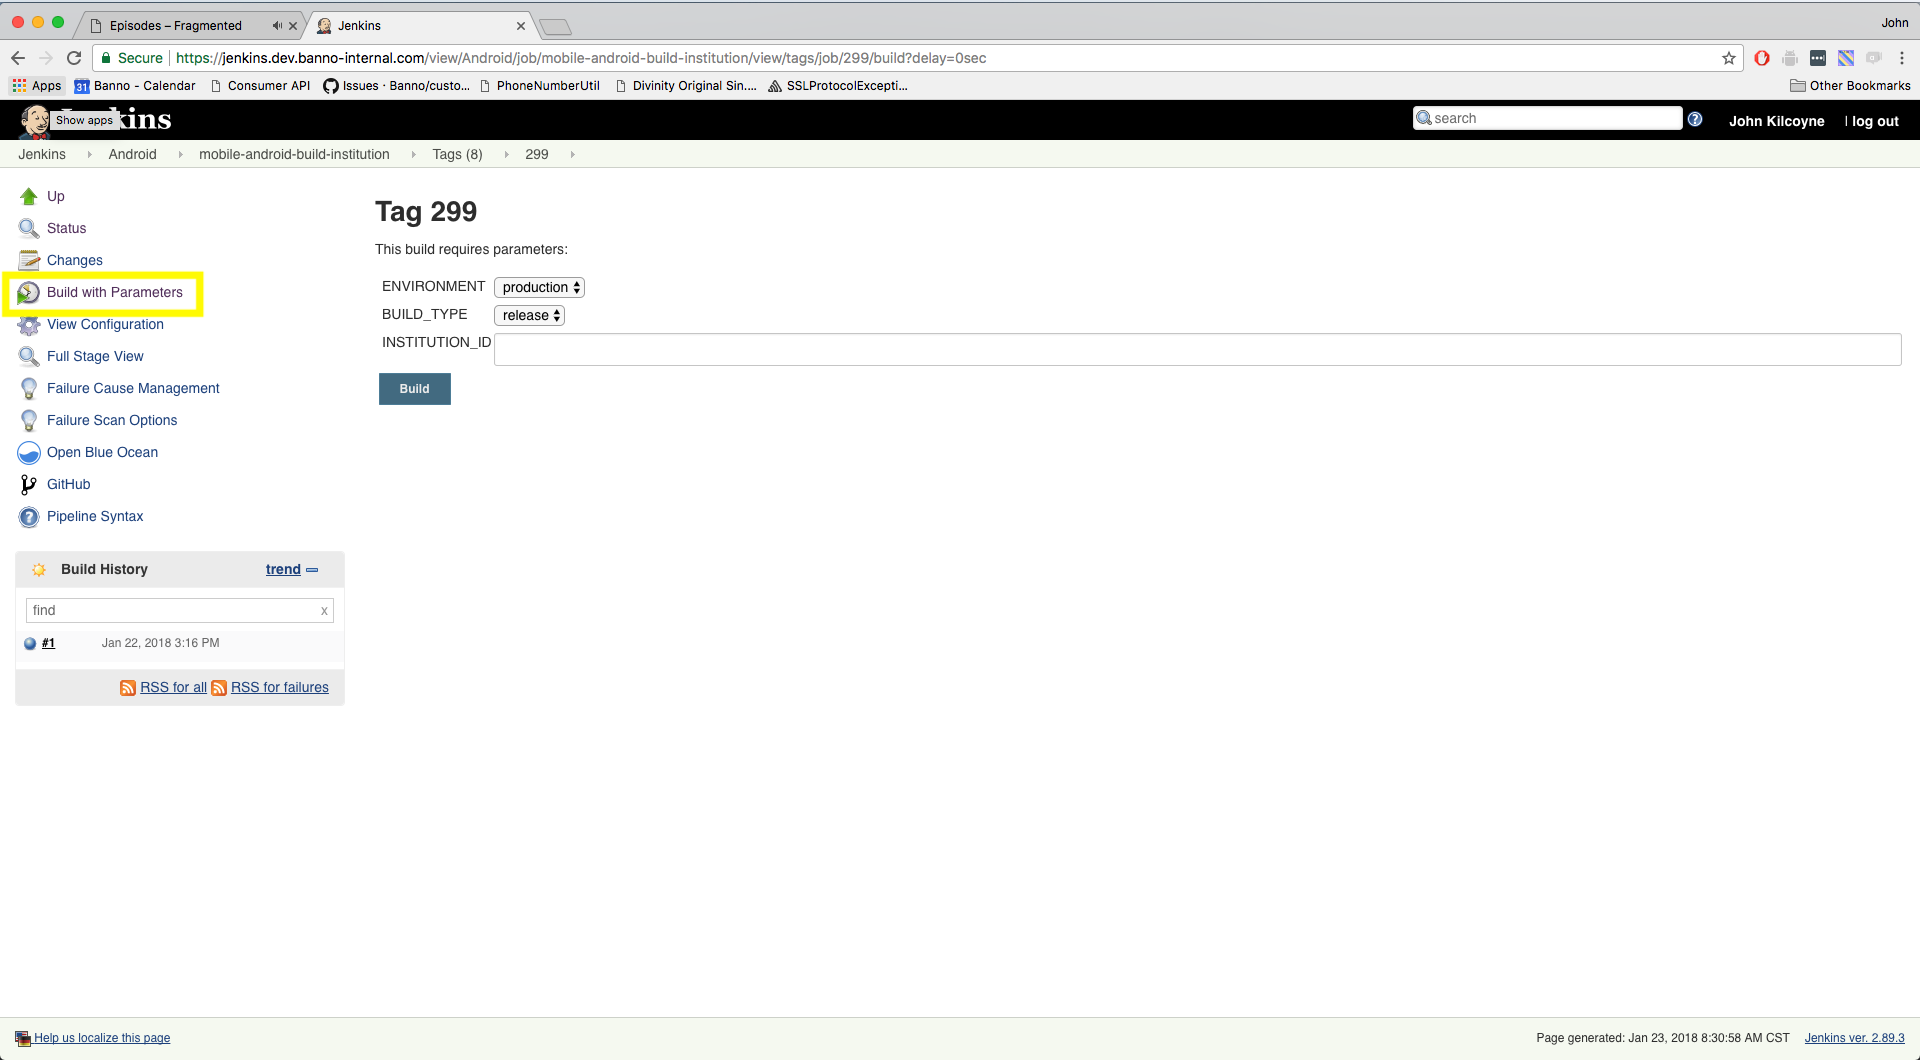
Click on it, you should see options for ENVIRONMENT and INSTITUTION_ID, there will be a third option for tags later than ‘298’ called BUILD_TYPE.
What ENVIRONMENT you use is dependant on what you want to use the apk for. If you are testing the app for a particular feature, make sure to ask what environment to use. If you want to see the app run the current release, then use the ‘production’ environment. The INSTITUTION_ID is found within the properties.json of the institution within grip-assets that you wish to build, InstitutionIds can also be found on fetch-reporting. The INSTITUTION_ID’s for all institutions can be found here, although you may want to make sure you have valid credentials before building the apk. If you are looking for a specific set of institution abilities to test against here is a good place to start.
It’s worth mentioning, you can log into any institution’s app with the username bannogriptestuser prefix and a unique id to suffix, something like username: “bannogriptestuser112018”, and the password: test. This will provide you with some basic mocked data to populate the app with.
Lastly, the BUILD_TYPE is either ‘release’ or ‘debug’. If you’d like to check the logs for API interactions for a given section of the app then build the ‘debug’ version, otherwise use the ‘release’ version. You can build the app with either of these types, but you should have a reason for building the debug version, otherwise just build the ‘release’ version. For the API interaction logging, take a look at the Useful Android Studio Tools section of the wiki.
So let’s go ahead and build an apk, I’m going to build Artemis, institutionId: 5e4dcedb-567f-417b-b428-2231d4713b63, on the in environment ‘uat’, and since this is tag before 299 the BUILD_TYPE option is gone, so BUILD_TYPE is ‘release’ by default.

Hit build and you will be put back at the tag page, you should see your Jenkins job queued up at the top of the queue in the lower left corner, let’s click on the job number.
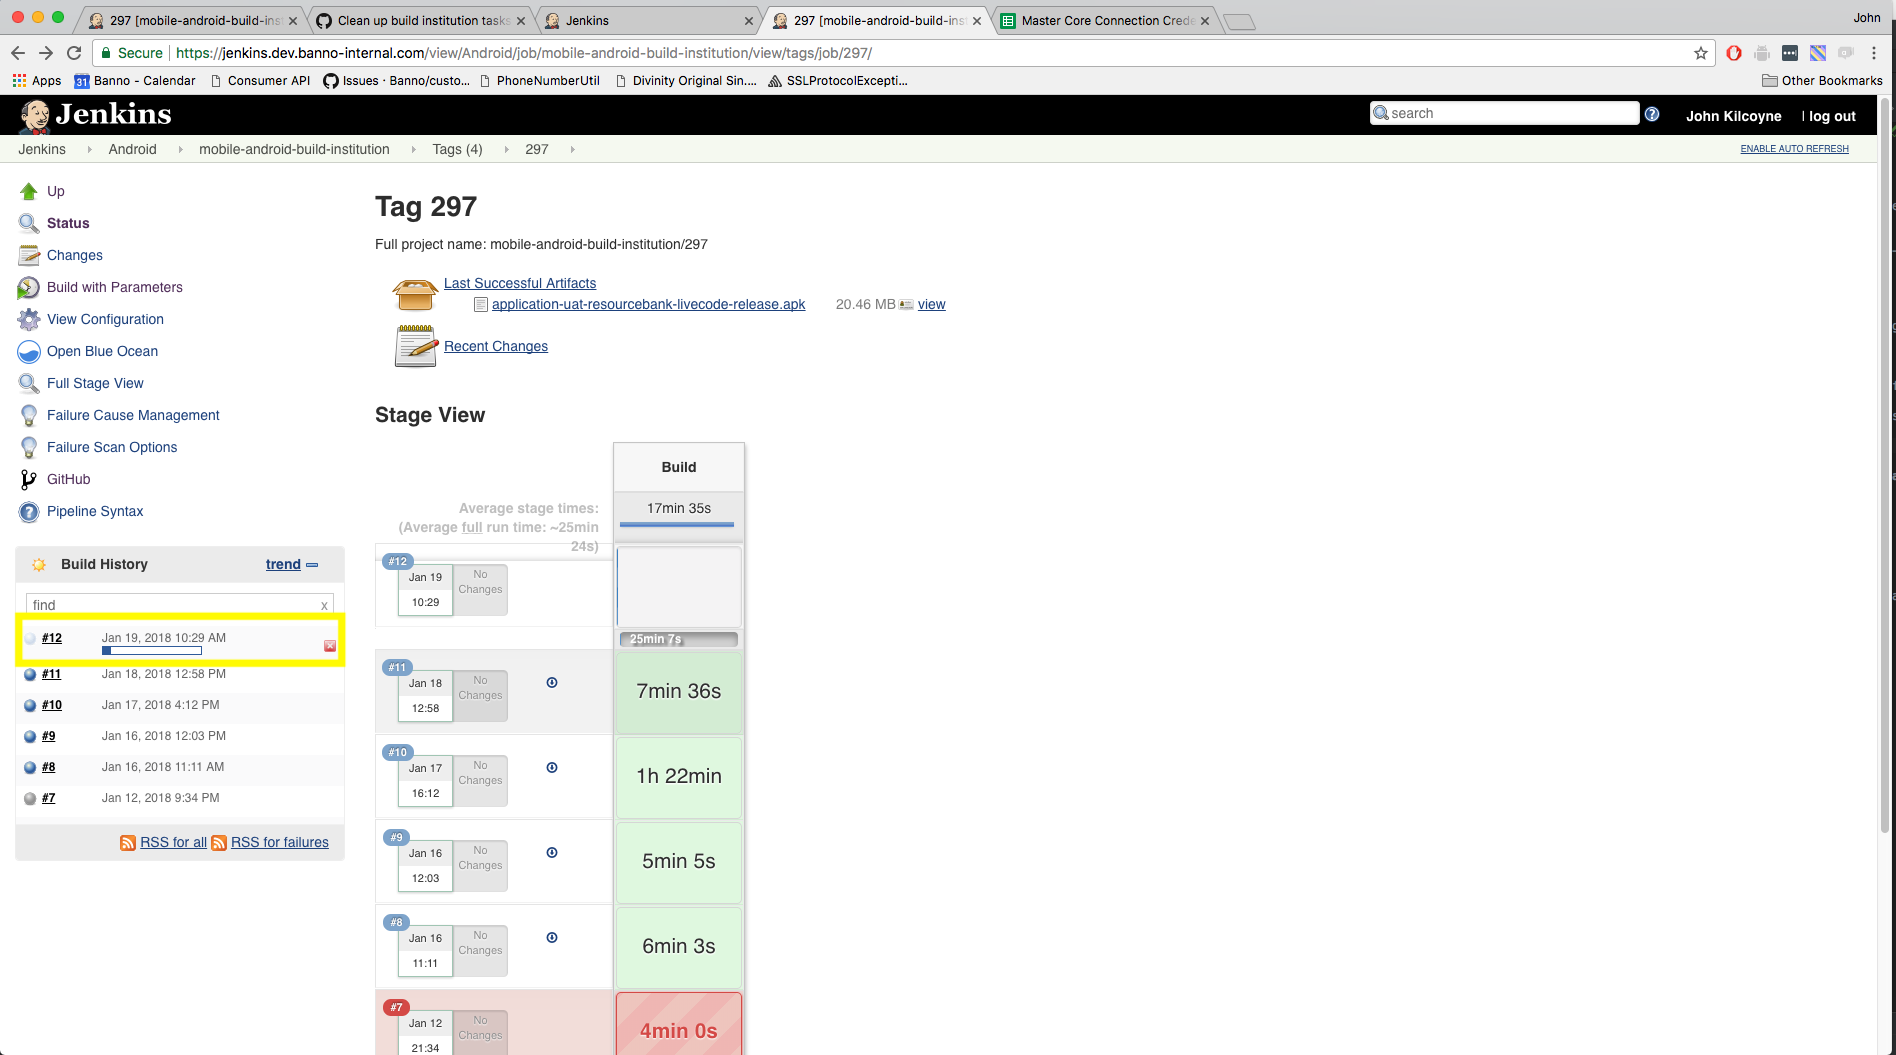
It usually takes about 5-10 minutes to build so give it a little time. Once it has successfully finished, the apk will appear ready to be downloaded. If unsuccessful, double check the INSTITUTION_ID then, ping in the Android room asking why the build failed.
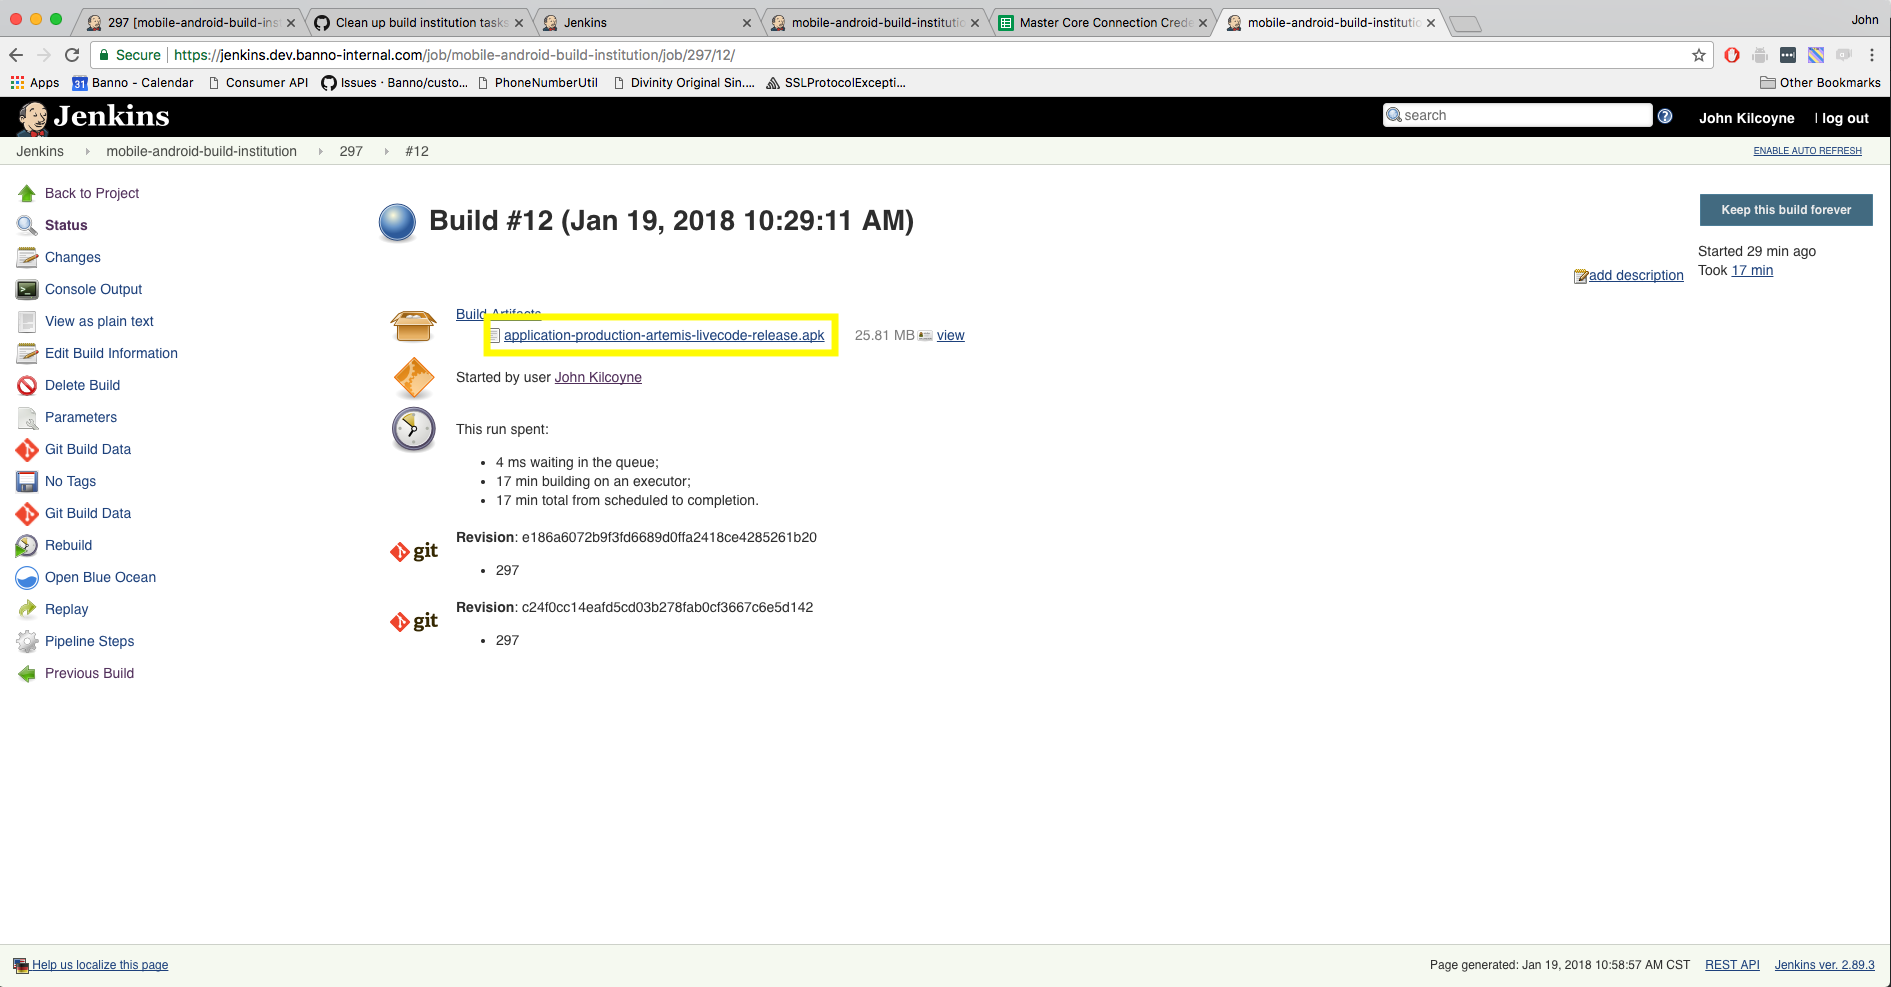
Now let’s download the apk. Click on the link to the .apk file underneath Build Artifacts
If what you are looking for is the current, in development, version of master to test against. Click on the ‘branches’ tab and find the branch “master”. Be sure to ask the Android team if master is in a stable/testable state. Follow the same steps as you would for building a release apk.
Setting up your emulator
Now that we have Android Studio set up and an apk downloaded on your MacBook, let’s open up Android Studio with our test project.
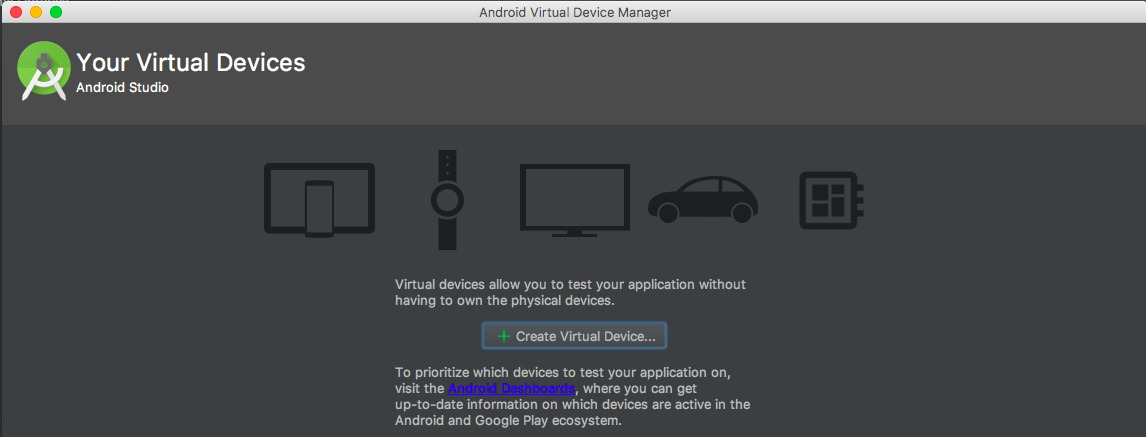
In the toolbar, there should be an icon showing a device and a green android in front of it, this is the AVD Manager, or Android Virtual Device Manager, click on that.
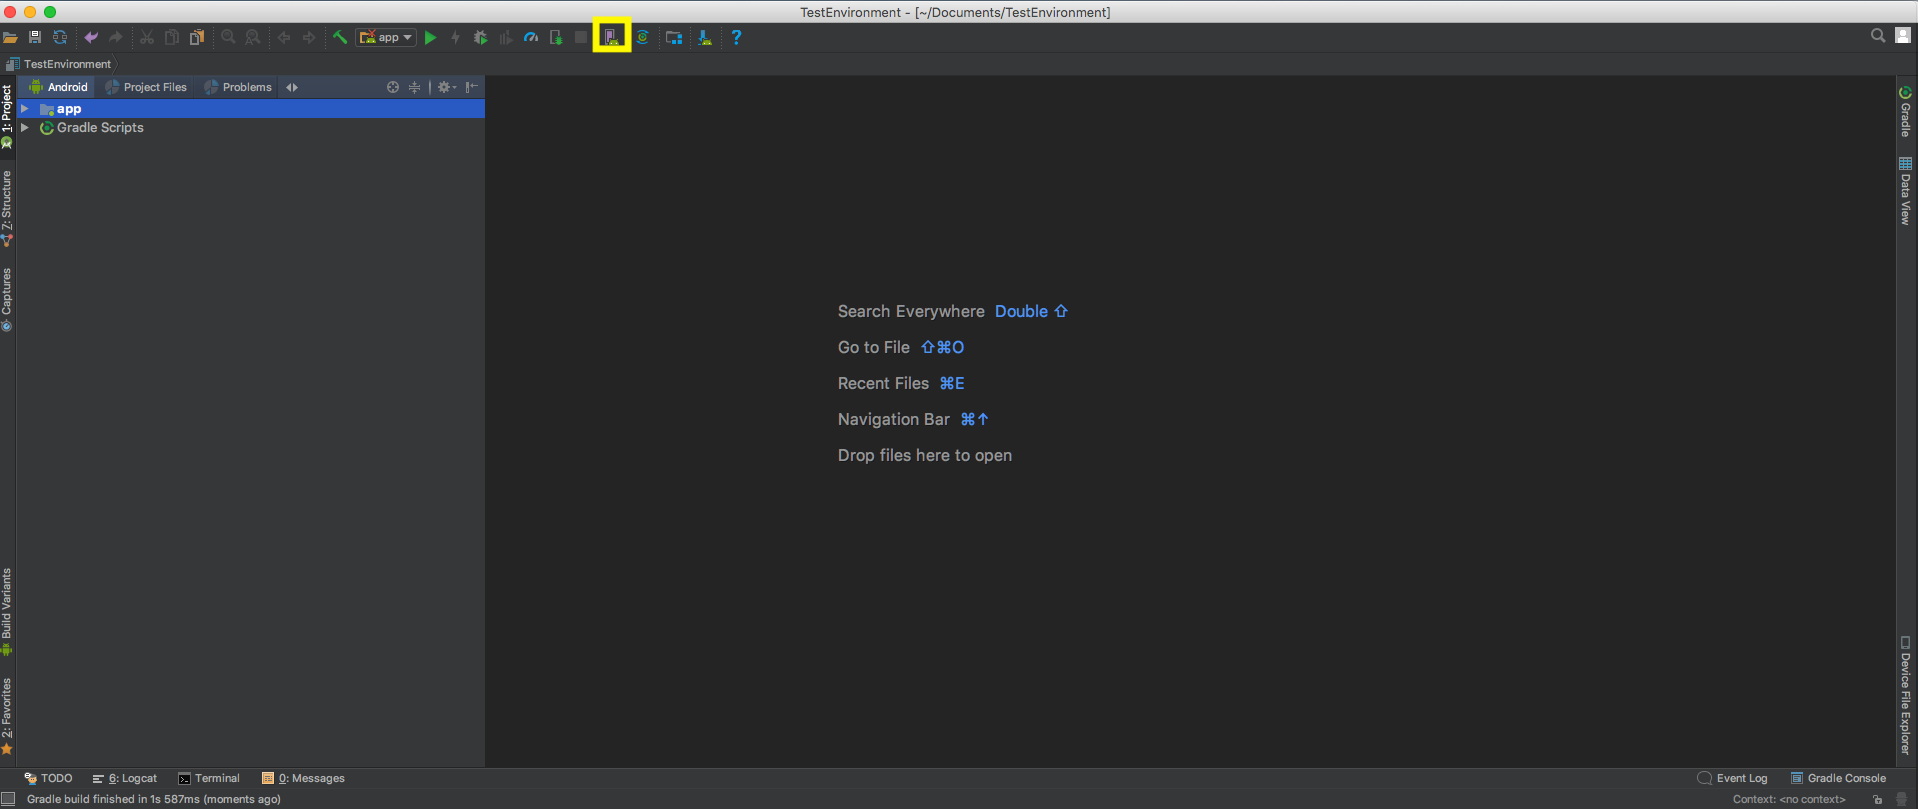
The AVD should be showing with the option to create a virtual device, click on “Create Virtual Device”.
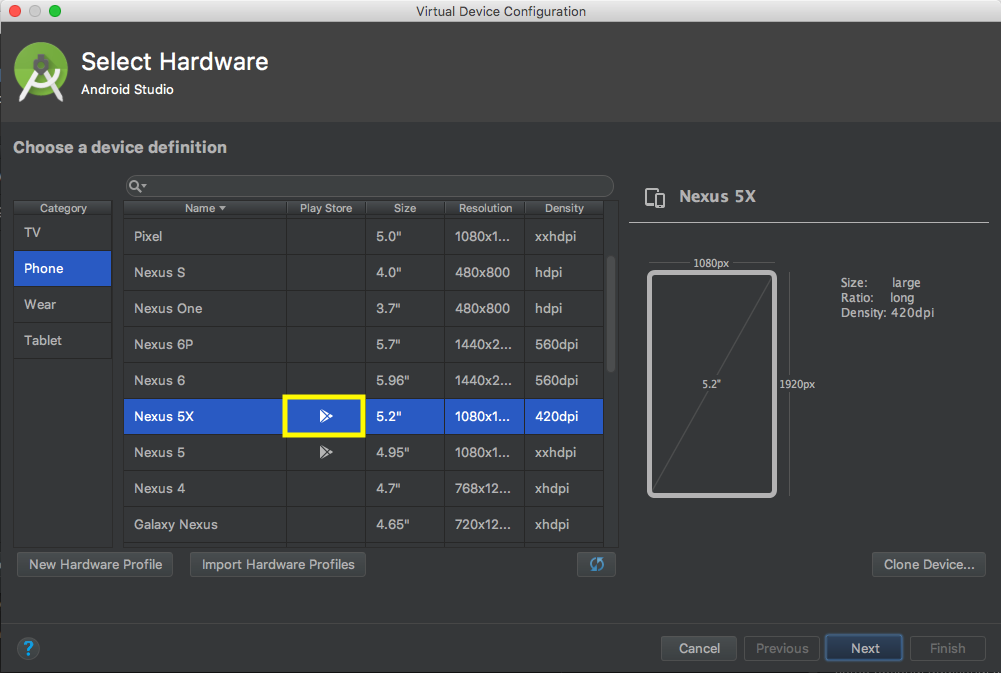
First thing the AVD will have you do is select a device, there are quite a few devices to choose from tablets/phones etc.
We recommend that you choose a virtual device with the Play Store installed. Emulators with the Play Store installed are able to update dependencies that may be required for our app to run.
You’re welcome to try any emulator image you would like but be warned that thing may stop working at some point in the future as the app dependencies are updated.
Also worth noting that our Banno Mobile app supports tablet devices, meaning that our app is configured for use on large screen devices like tablets. Check it out if you’re curious.
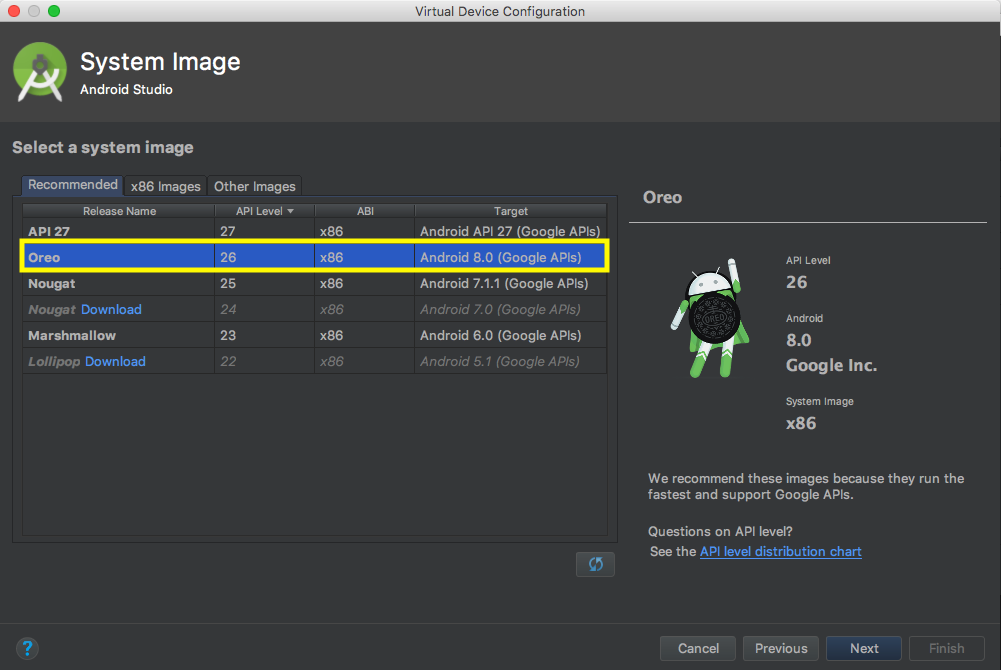
Once a device is chosen you need to designate an OS to run. We will typically shoot for the latest, non-beta, OS release in the recommended tab. Although any of the OS options are valid and should run fine. The latest non-beta release will be the highest alphabetically named dessert release in the recommended column, see screenshot below.
Again you’ll need to download some more components, so click download, accept the license and finish.
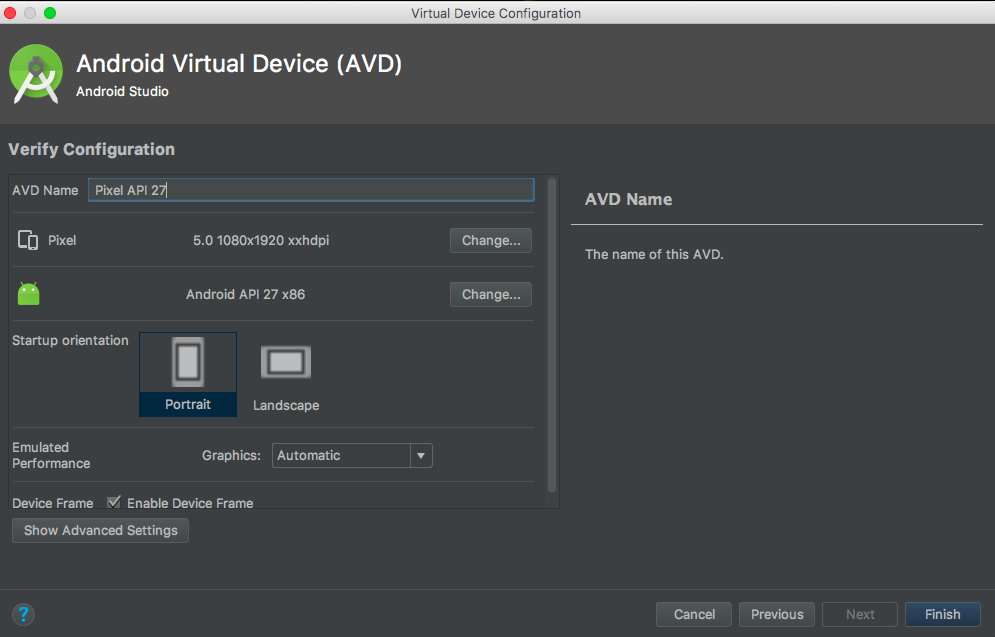
Once you’ve downloaded the OS, select it and click next. The next screen is just some optional additional setup, I recommend keeping all of these default. Click finish when all done.
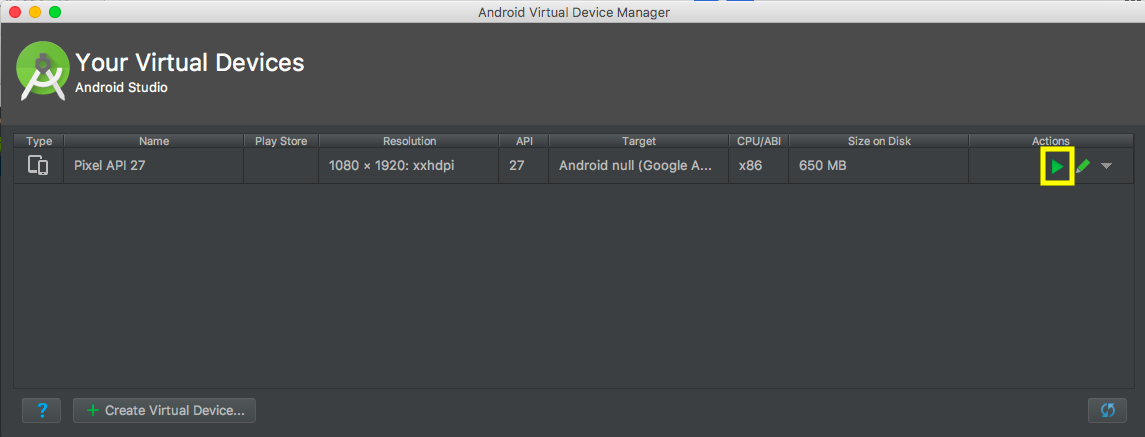
Now we should be looking at the AVD screen again, lets click the green arrow to launch the emulator.
Now that we have an emulator up and running, you may see a notification at the top of the emulator saying “Platforming clean boot: Snapshot doesn’t exist”. That’s safe to dismiss, if you cannot dismiss that notification, reboot the emulator and it should disappear.
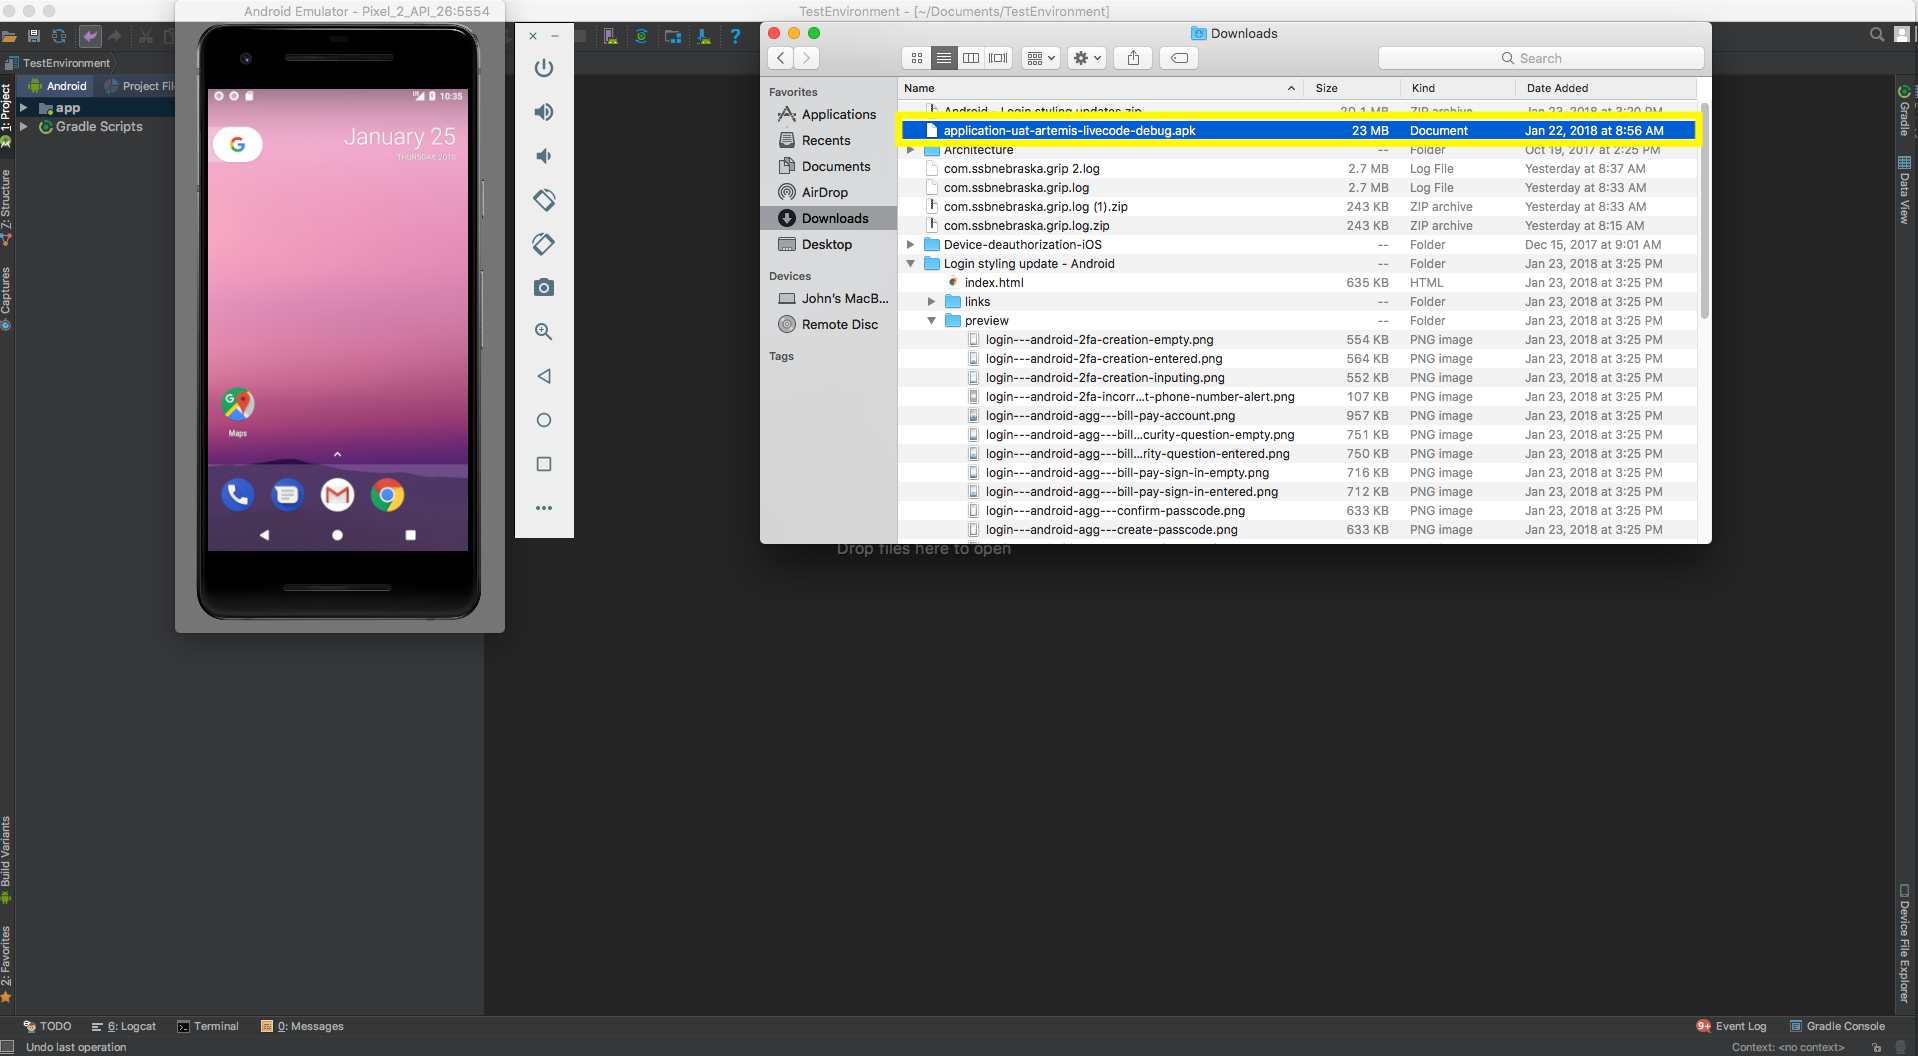
We can install the apk. Open up Finder and find the location of the downloaded apk. Drag and drop the apk file from finder onto the face of the emulator, and the emulator will install it.
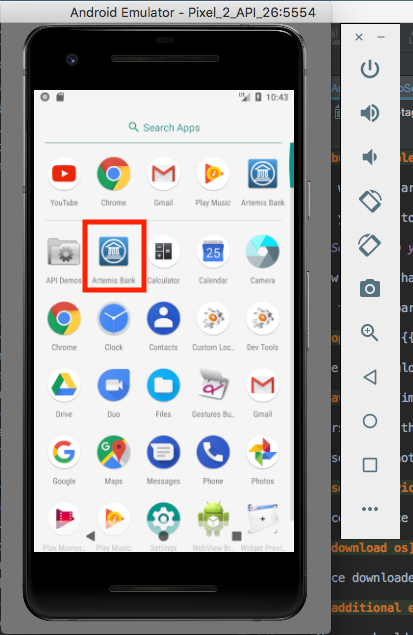
Look in the apps window on the emulator for the newly installed app, and click to launch. That’s it!
A couple things to note, Android emulators behave just like physical Android devices. Emulators are allowed dedicated amount of RAM on your machine, this can cause performance issues to the rest of your machine, but if installing and running the app is all you are doing this shouldn’t be much of an issue.
To learn more about what Android Emulators can do, check out Android’s documentation
Apk on physical device
In order to get a version of the app up and running on your physical device you need to get the apk installed on the device. The typical way we go about this is to build an apk and email it to yourself as an attachment, then open the email from your Android device.
If you want to monitor the app on a physical device through Android Studio you can, you just need to enable USB Debugging. On the device, open the Settings app, select Developer options, and then enable USB debugging. If you don’t have developer options enabled, check out Android’s documentation. Then just connect the device to your computer check out the logcat or profiler for any output you’d like to monitor.
Useful Android Studio tools
Now that the app is up and running we may want to grab some screenshots or video to capture inconsistencies between the app and designs. To capture screenshots/video from the emulator or connected device open up the logcat tab at the bottom of the Android Studio window.
Here you will see a drop down tab for selecting connected devices as well as a dropdown for which app you would like to monitor. Most of the time you will only have one connected device and one app running anyway.
If you increase the logcat window size you’ll see there are a few icons to the left. There are a couple that are useful here:
- The camera icon, this is allows you to take screenshots
- the second is the green record box right below the camera, this allows you to record video of the app running. If you record video rename the video a file format that’s playable, ‘.mp4’ or ‘.mov’ are what I would typically pick.
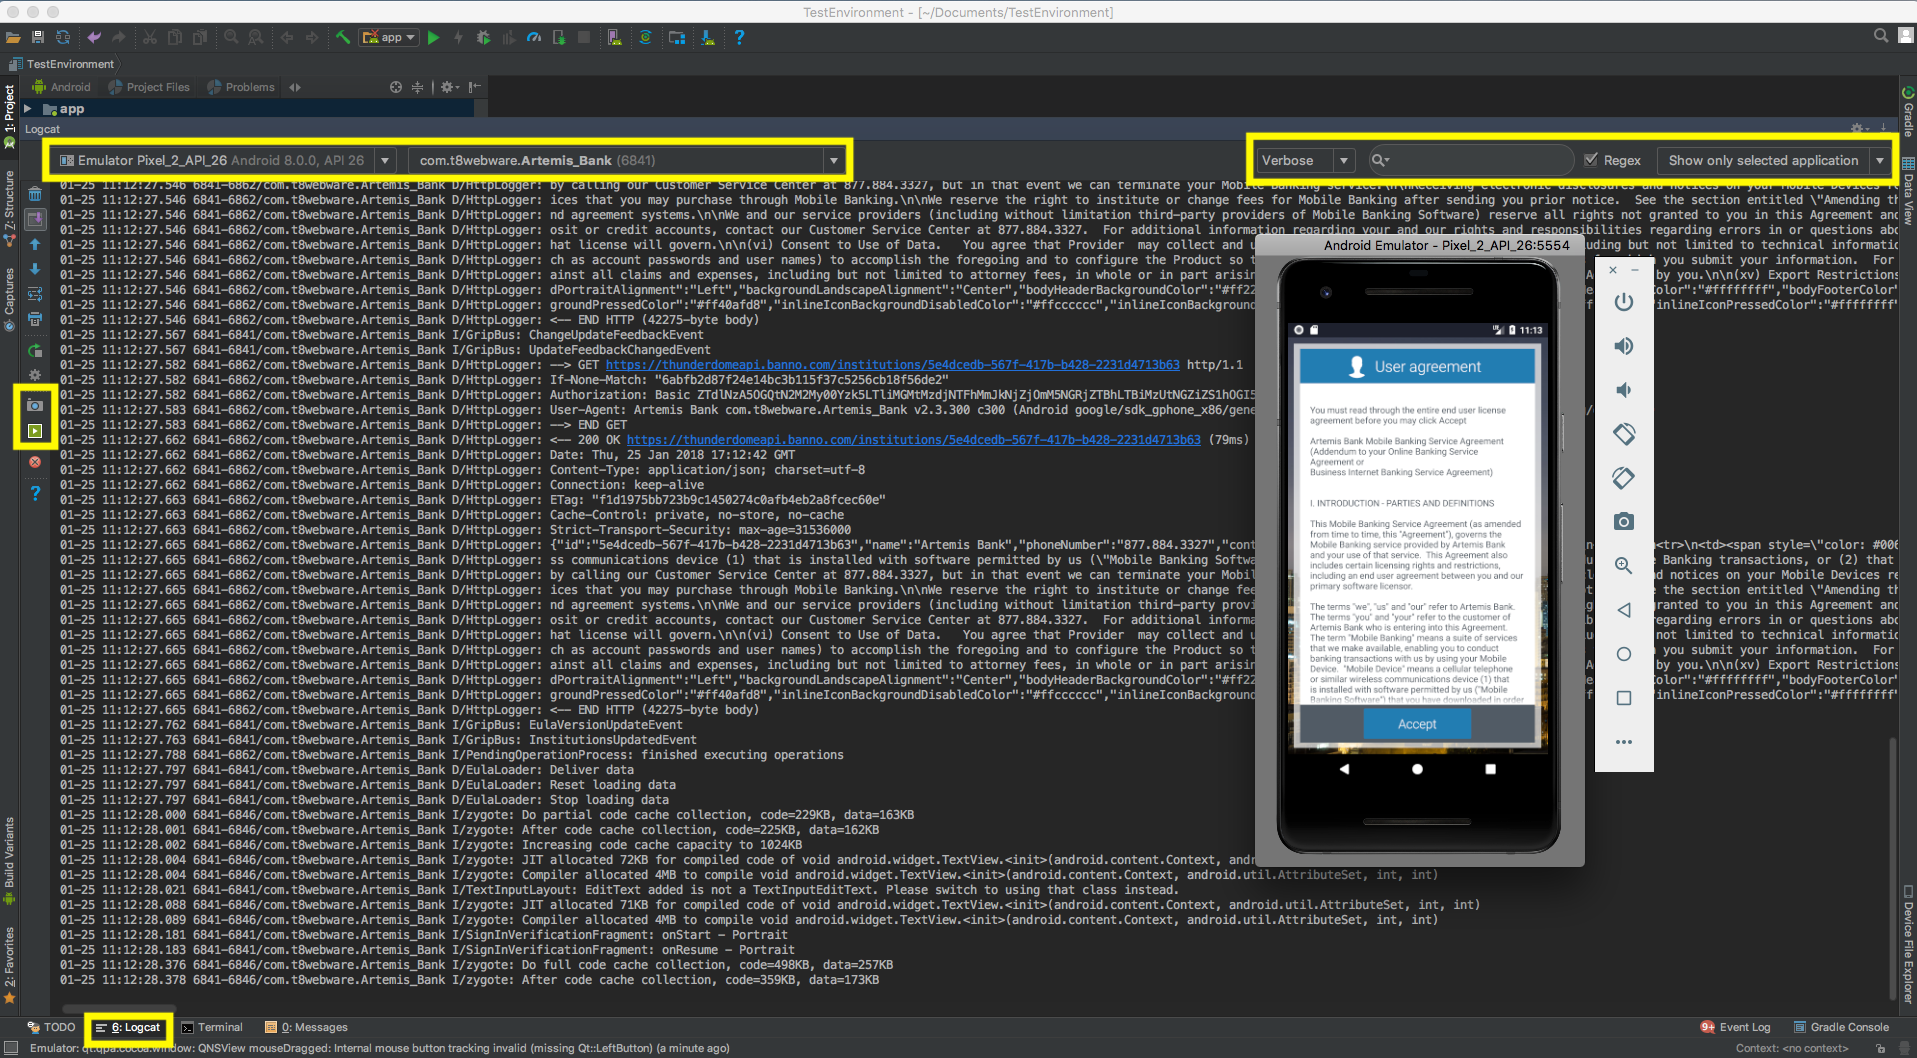
Another useful tool is the output of the logcat itself, if you built a ‘debug’ apk then you can log some of the interactions with the API. In the search bar in the logcat widow search “HTTP”, making sure that the connected device and the app running are correct. You should now be able to see all the api interactions including payloads and responses.