General
You will want ESLint working and mermaid diagrams to render in markdown.
VSCode
ESLint Plugin for VSCode: https://marketplace.visualstudio.com/items?itemName=dbaeumer.vscode-eslint
ESLint Keyboard Shortcuts
Running the ESLint extension from the actions menu is a little tedious. There are a couple ways to streamline auto-fixing your files: creating a keyboard shortcut and setting Visual Studio Code to auto-fix whenever you save files.
Using these methods, you will probably perform lint checks more frequently, allowing you to fix problems as they arise instead of having a bunch of issues to deal with at the end of the development process.
Bear in mind that if you want to review errors and warnings before they are fixed, you must review them before using either of these auto-fixing methods.
To add a keyboard shortcut, open the Keyboard Shortcuts preferences by selecting Code -> Preferences -> Keyboard Shortcuts in Visual Studio Code’s menu bar.
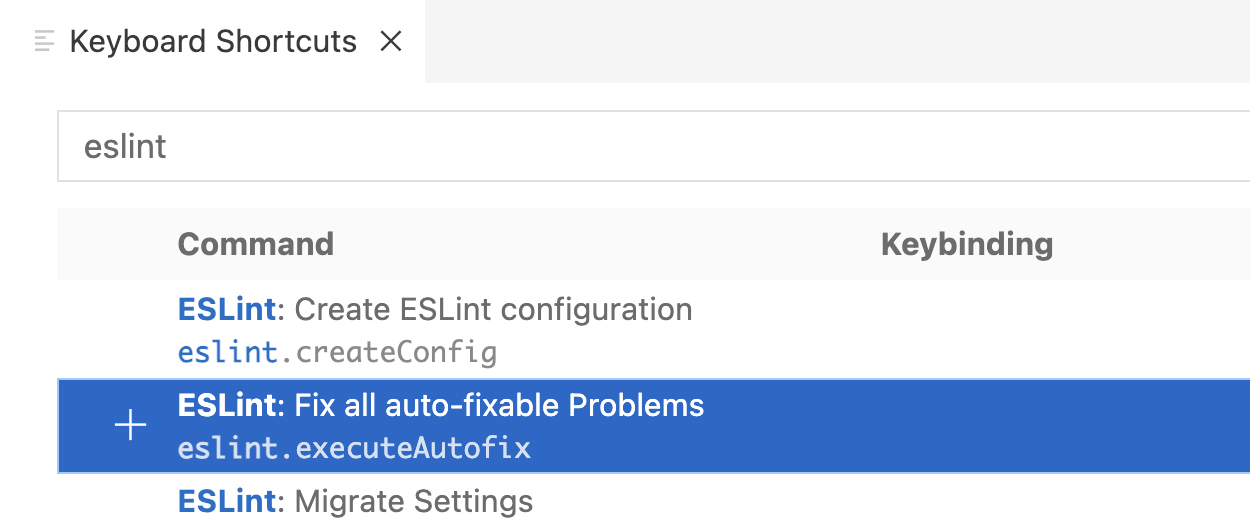
In the keybindings search bar at the top, enter “eslint.” Then, hover over the row for “ESLint: Fix all auto-fixable Problems” and click the
“+” to its left.
Enter a keybinding that will work for you, such as Command-Shift-A. The pop-up will warn you if the combination you enter is already assigned to another action. Try again until you find one that is unassigned, and press Return to set it.
Note that Visual Studio Code supports chords - two separate keystroke combinations entered in sequence, such as Command-Shift-A Command-Shift-A. If you enter one combination after another, the second combination will be appended to the first to make a chord. If you do not want the chord, enter the new combination again to set it as the single-combination shortcut.
To exit the keybinding entry pop-up without assigning a shortcut, click anywhere outside the pop-up.
ESLint On Save
To enable auto-fix on save, open Visual Studio Code’s settings by selecting Code -> Preferences -> Settings.
The settings window has two tabs: User and Workspace. Settings on the User tab apply globally; those on the Workspace tab apply only to the current workspace, or project.
In the Workspace tab, begin typing “code actions on save” and click “Edit in settings.json” when it appears.
When settings.json is open, Visual Studio Code suggests options to add source.fixAll or source.organizeImports.
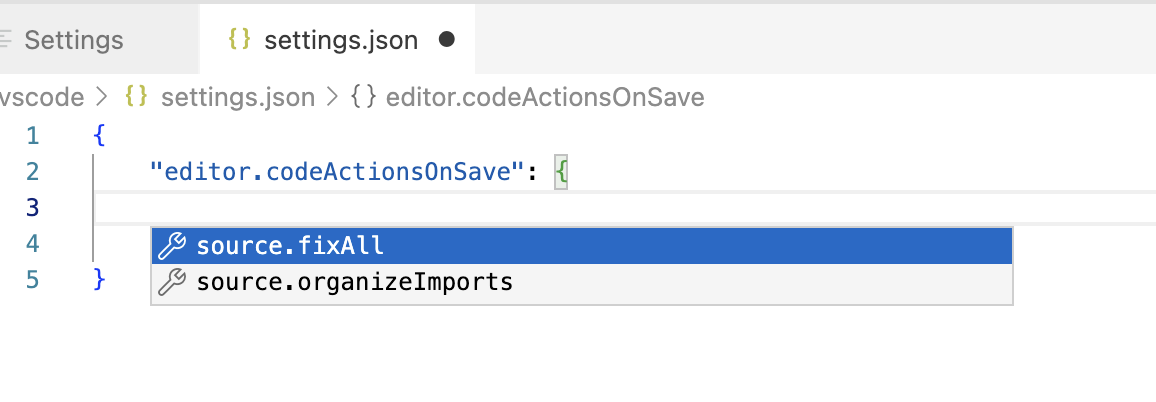
Ignore these suggestions and add the code below instead.
(If you do use the suggestion to add source.fixAll, you will need to modify the value to include .eslint and ensure it is set to true.)
Add two properties to settings.json:
{
  "editor.codeActionsOnSave": {
    "source.fixAll.eslint": true
  },
  "eslint.validate": [
    "javascript"
  ]
}
Save the file when you are done.
Setting up a keyboard shortcut or auto-fix on save - or neither - is a personal preference. For the purposes of this book, it is up to you. But however you prefer to use linting, it is a tool we recommend for all your projects to help you avoid errors and write consistent, easy-to-maintain code.
WebStorm/JetBrains IDEs
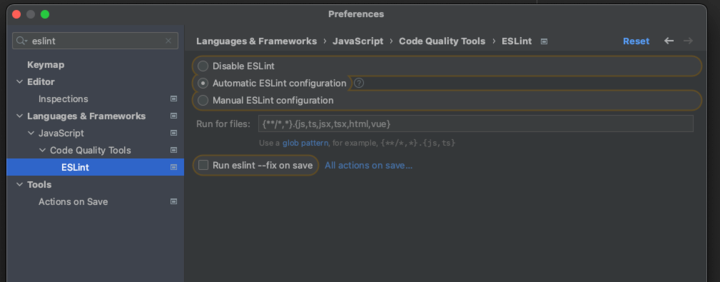
In preferences, search for ESLint and set it to automatic and languages and frameworks -> JavaScript -> Code Quality Tools -> ESLint
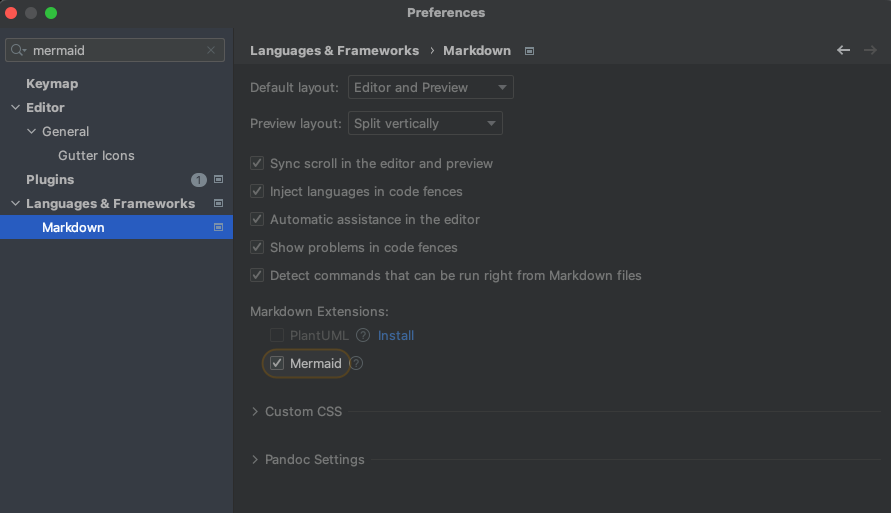
Enable Mermaid rendering. In preferences, search for Mermaid. Under Languages & Frameworks -> Markdown, click install next to Mermaid and then check the box to turn it on the extension.
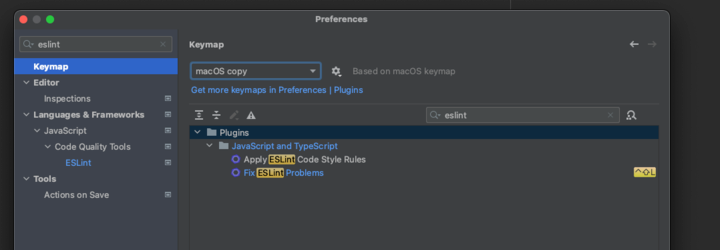
WebStorm ESLint Keyboard Shortcut
To have a keyboard shortcut to autofix (if you prefer that over running on save).
Go to Keymap, and then you can add one to Fix ESLint Problems (it make take a few tries to find an available shortcut or you may have to take a shortcut off another command so it’s available for this one, I use control + shift + L (for lint) but I think I might have had to take that off of some other command in webstorm and/or macOS)
There is also https://plugins.jetbrains.com/plugin/13968-macos-for-all which you might like.